Eggo Mini Pancakes are a convenient and delicious breakfast option, offering bite-sized, pre-cooked pancakes that are ready to heat. Perfect for busy mornings or quick snacks, they are made with 9 vitamins and minerals for added nutrition.

1.1 What Are Eggo Mini Pancakes?
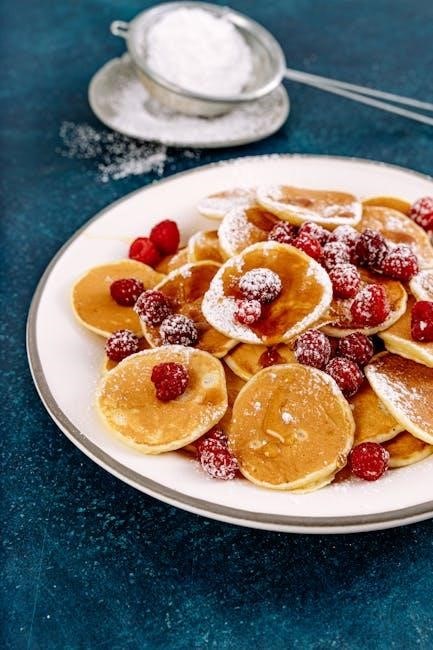
Eggo Mini Pancakes are bite-sized, pre-cooked frozen pancakes made from a blend of pancake batter, offering a convenient and tasty breakfast or snack option. They are designed to be small in size, making them ideal for quick meals or on-the-go eating. These mini pancakes are crafted with a mix of ingredients that provide a soft, fluffy texture and a golden-brown appearance, similar to homemade pancakes. Each serving contains 9 essential vitamins and minerals, ensuring a nutritious start to your day. They are packaged in a resealable bag to maintain freshness and can be easily heated in the microwave, oven, or toaster for a fast and delicious meal; Perfect for both children and adults, Eggo Mini Pancakes are a versatile choice for busy households, offering a balance of convenience, taste, and nutrition. Their compact size also makes them a great option for meal prepping or adding to lunchboxes.
1.2 Why Choose Eggo Mini Pancakes?
Eggo Mini Pancakes are a top choice for many due to their unmatched convenience, delicious taste, and nutritional value. They offer a quick and easy way to enjoy a warm, fluffy breakfast without the hassle of cooking from scratch. Perfect for busy mornings, these bite-sized pancakes are ready to eat in just minutes when heated in the microwave, oven, or toaster. Additionally, they are enriched with 9 essential vitamins and minerals, making them a nutritious option for families. Their compact size is ideal for portion control and satisfies cravings without overeating. The golden-brown color and soft texture provide a homemade feel, while the resealable packaging ensures freshness for a long time. Whether you’re preparing a fast breakfast, packing a snack, or adding a tasty side to a meal, Eggo Mini Pancakes are a versatile and satisfying choice that fits into any lifestyle.
1.3 Key Features and Benefits
Eggo Mini Pancakes come with a variety of impressive features that make them a standout breakfast option. Their compact size is perfect for portion control and easy handling, especially for children. These pancakes are pre-cooked and frozen, ensuring they retain their flavor and texture when heated. The packaging is resealable, maintaining freshness for extended periods. They are also enriched with 9 essential vitamins and minerals, providing a nutritious start to the day. The versatility of heating methods—microwave, oven, toaster, or skillet—allows for flexibility to suit any preference. Additionally, their golden-brown color and soft, fluffy texture mimic homemade pancakes without the effort. The quick cooking time means you can enjoy a warm, delicious breakfast in just minutes, making them ideal for busy households. Overall, Eggo Mini Pancakes offer a convenient, tasty, and nutritious solution for any meal or snack.

Microwave Instructions for Eggo Mini Pancakes
Microwaving Eggo Mini Pancakes is quick and easy. Simply place the desired number on a microwave-safe plate, heat on high for 30-45 seconds, and check for warmth to avoid overcooking.
2.1 General Microwave Guidelines
When microwaving Eggo Mini Pancakes, always place them in a single layer on a microwave-safe plate to ensure even heating. The cooking time varies depending on the number of pancakes and your microwave’s wattage. For example, 3 pancakes typically take 30-35 seconds, while 6 pancakes require 40-50 seconds. It’s important to monitor the pancakes to avoid overheating, as this can make them tough or dry. If using a lower-wattage microwave, you may need to increase the cooking time by 10-second intervals. Additionally, microwaves with higher wattage may cook the pancakes faster, so adjust accordingly. Always check the pancakes after the recommended time to ensure they are heated through but not overcooked. Let them stand for a few seconds before serving to allow excess moisture to evaporate. Following these guidelines will help you achieve perfectly cooked, fluffy Eggo Mini Pancakes every time.
2.2 Step-by-Step Microwave Cooking Process
To cook Eggo Mini Pancakes in the microwave, follow these simple steps:
Remove the desired number of pancakes from the packaging or pouch.
Place the pancakes in a single layer on a microwave-safe plate to ensure even heating.

Microwave on High for the recommended time based on the number of pancakes:
― 3 pancakes: 30-35 seconds
― 6 pancakes: 40-50 seconds
⎼ 9 pancakes: 55-60 seconds

Carefully remove the plate from the microwave and check if the pancakes are warm and fluffy. If not, heat in additional 10-second increments until desired warmth is achieved.
Let the pancakes stand for 10-15 seconds before serving to allow any excess moisture to evaporate.
This method ensures quick and even cooking, delivering perfectly heated Eggo Mini Pancakes every time.
The cooking time for Eggo Mini Pancakes in the microwave varies depending on the number of pancakes and your microwave’s wattage. For optimal results, follow these guidelines: These times are based on a standard 1100-watt microwave. If your microwave has a different wattage, adjust the cooking time accordingly. Higher wattage microwaves may require shorter times, while lower wattage models might need a few extra seconds. Always check the pancakes after the recommended time to avoid overheating, which can make them tough or dry. Adjust in 10-second increments until they reach your desired warmth and texture. To ensure your Eggo Mini Pancakes come out fluffy and not soggy, follow these microwave cooking tips: Avoid overcrowding the plate by cooking pancakes in a single layer. This ensures even heating. For the best results when microwaving Eggo Mini Pancakes, consider these helpful tips: Place a paper towel under the pancakes to absorb excess moisture and prevent sogginess. Adjust cooking times based on your microwave’s wattage, as higher wattage models may require shorter heating periods. If cooking multiple pancakes, ensure they are spread out in a single layer for even heating. After microwaving, let the pancakes stand for 10-15 seconds before serving to allow steam to escape and the texture to set. Avoid overheating, as this can make the pancakes tough. For a crisper texture, try toasting the pancakes after microwaving or cooking them in a skillet for a golden finish. Experiment with toppings like syrup, butter, or fresh fruit for added flavor. Lastly, always clean your microwave after cooking to prevent food residue from building up. Using a paper towel during the microwaving process is a simple yet effective way to ensure even heating and prevent sogginess in Eggo Mini Pancakes. Place a clean, dry paper towel flat on the microwave-safe plate before adding the pancakes. This absorbs excess moisture and helps distribute heat evenly. For extra crispiness, you can place another paper towel on top of the pancakes. The paper towel acts as a barrier, reducing steam buildup and ensuring a fluffy texture. After microwaving, remove the pancakes carefully to avoid tearing. If you prefer a crisper texture, you can flip the pancakes and microwave for an additional 5-10 seconds. This method works well for both frozen and thawed pancakes. Remember to adjust cooking times slightly if using a paper towel on both sides, as it may affect the overall heating time. This trick enhances the texture and makes the pancakes taste fresher and more homemade. Microwave wattage plays a significant role in cooking Eggo Mini Pancakes evenly. Higher-wattage microwaves cook faster, while lower-wattage models may require longer cooking times. For example, in a 1100-watt microwave, 3 pancakes take 30-35 seconds, but in a lower-wattage microwave, you may need to add 10-15 seconds. Conversely, if your microwave has higher wattage (e.g., 1200-1300 watts), reduce the cooking time by 5-10 seconds to avoid overcooking. To ensure perfect results, start with the recommended time for your pancake quantity, then adjust based on your microwave’s power. For instance, if you’re heating 6 pancakes in a 900-watt microwave, increase the time to 50-60 seconds. Always check the pancakes after the initial cooking time and add intervals of 5-10 seconds if needed. This ensures they are heated through without becoming tough or dry. Refer to your microwave’s wattage specifications, usually found in the user manual or on the appliance itself, to fine-tune your cooking times. Microwave wattage significantly impacts cooking time for Eggo Mini Pancakes. Higher-wattage microwaves cook faster, while lower-wattage models require longer heating periods. For example, in a 1100-watt microwave, 3 pancakes take 30-35 seconds, but in a 900-watt microwave, you may need 40-45 seconds. If your microwave has higher wattage (e;g., 1200-1300 watts), reduce cooking time by 5-10 seconds to prevent overcooking. To achieve perfect results, start with the recommended time for your pancake quantity and adjust based on your microwave’s power. For instance, 6 pancakes in a 900-watt microwave may need 50-60 seconds. Always check the pancakes after the initial cooking time and add 5-10 second intervals if needed. This ensures they are heated through without becoming tough or dry. Refer to your microwave’s wattage, usually found in the user manual, to fine-tune your cooking times for optimal results. Eggo Mini Pancakes can also be cooked in the oven, toaster, or skillet. These methods offer alternative ways to enjoy your pancakes, providing flexibility beyond microwave heating. For a crispier texture, Eggo Mini Pancakes can be baked in the oven. Preheat the oven to 375°F (190°C). Place the desired number of pancakes in a single layer on a baking sheet lined with parchment paper. Bake for 5-7 minutes per side, or until golden brown. For smaller batches, reduce the cooking time slightly. Ensure the pancakes are not overcrowded to allow even heating. Flip them halfway through the cooking time to achieve an evenly cooked texture. Keep an eye on the pancakes to prevent overheating, as oven temperatures can vary. This method is ideal for those who prefer a firmer texture or want to avoid using the microwave. It’s also a great way to cook multiple pancakes at once for a family breakfast. Let the pancakes cool slightly before serving for the best experience. Cooking Eggo Mini Pancakes in a toaster is a quick and convenient method. Start by preheating your toaster to its highest setting. Place the desired number of mini pancakes in a single layer on the toaster tray, ensuring they do not overlap. Toast the pancakes for about 2-3 minutes, or until they are golden brown and crispy. Depending on your toaster’s power, you may need to adjust the cooking time slightly. For even cooking, you can flip the pancakes halfway through the toasting time. Once done, carefully remove the pancakes from the toaster and let them cool for a few seconds before serving. This method adds a delightful crunch to the pancakes, making them a tasty alternative to microwave cooking. Ensure your toaster is clean and free of debris to prevent any unwanted flavors. Cooking Eggo Mini Pancakes in a skillet is a great way to achieve a crispy, golden-brown texture. Start by preheating a non-stick skillet or frying pan over medium heat. Lightly grease the skillet with a small amount of butter or cooking oil to prevent sticking. Once the skillet is hot, carefully place the desired number of frozen mini pancakes in a single layer, ensuring they do not overlap. Cook for 1-2 minutes on each side, flipping when bubbles appear on the surface or the edges start to dry. Adjust the heat as needed to prevent burning. For an extra crispy finish, cook for an additional 30 seconds to 1 minute. Remove the pancakes from the skillet and let them cool slightly before serving. This method allows for a more traditional pancake texture and flavor, making it a great alternative to microwave or toaster cooking. Frequently asked questions about Eggo Mini Pancakes include queries about microwaving frozen pancakes, toaster compatibility, and reheating leftovers. These topics are addressed in detail within the guide. Yes, you can microwave frozen Eggo Mini Pancakes for a quick and convenient breakfast. Simply remove the desired number of pancakes from the packaging and place them in a single layer on a microwave-safe plate. Heat on high for 30-35 seconds for 3 pancakes, 40-50 seconds for 6, and 55-60 seconds for 9. Adjust the time based on your microwave’s wattage, as higher wattage may require shorter cooking times. To avoid sogginess, consider placing a paper towel under the pancakes to absorb excess moisture. Let them cool for 10-15 seconds before serving. This method ensures a fast and delicious breakfast option.
While the microwave is the most common method, you can also prepare Eggo Mini Pancakes in a toaster for a crispy texture. Place the desired number of pancakes in a single layer on the toaster tray. Toast for about 2-3 minutes, or until lightly browned. Ensure the toaster is set to a medium heat setting to avoid burning. This method adds a golden crust while maintaining the pancakes’ soft interior. Always check the manufacturer’s guidelines for specific toaster instructions. This alternative cooking method provides a fresh and crunchy breakfast option. Reheating leftover Eggo Mini Pancakes is simple and quick. For the best results, use the microwave by placing the pancakes on a microwave-safe plate. Cover them with a paper towel to absorb excess moisture and heat on high for 10-15 seconds per pancake. If reheating multiple, adjust the time slightly. Alternatively, you can reheat them in a toaster or oven. For the oven, preheat to 350°F (175°C), place the pancakes on a baking sheet, and heat for 2-3 minutes. In a skillet, cook over medium heat for 1-2 minutes on each side until warmed through. Ensure leftovers are stored properly in the refrigerator or freezer and consume within a few days for optimal taste and texture. These methods ensure your Eggo Mini Pancakes remain fluffy and delicious even after reheating. Eggo Mini Pancakes offer a quick and delicious breakfast solution, perfectly suited for busy mornings. With microwave instructions that take just seconds, they provide convenience without compromising taste. Their bite-sized format makes them ideal for kids and on-the-go meals. Whether you prefer the microwave, oven, toaster, or skillet, there’s a method to suit every preference. Tips like using a paper towel for even heating and adjusting cooking times based on microwave wattage ensure perfect results. Additionally, reheating leftovers is straightforward, maintaining their fluffy texture. Eggo Mini Pancakes are not only easy to prepare but also packed with essential vitamins and minerals, making them a nutritious choice. Their versatility and convenience make them a great addition to any household, providing a satisfying breakfast experience every time.2.3 Recommended Cooking Times
– For 3 pancakes, heat on High for 30-35 seconds.
– For 6 pancakes, increase the time to 40-50 seconds.
– For 9 pancakes, cook for 55-60 seconds.
– If cooking 12 or more pancakes, extend the time further, ensuring even heating. 
2.4 Tips for Avoiding Soggy Pancakes

Use a paper towel underneath the pancakes to absorb excess moisture and prevent sogginess.
Adjust cooking times based on your microwave’s wattage. Higher wattage microwaves may require shorter cooking times.
Do not overcook. Check the pancakes after the recommended time and add intervals of 10 seconds if needed.
Allow the pancakes to cool for 10-15 seconds before serving. This helps retain their texture and prevents steam from making them soggy.
By following these tips, you can achieve perfectly cooked, non-soggy Eggo Mini Pancakes every time.
Additional Tips and Tricks
3.1 Using a Paper Towel for Even Heating
3.2 Adjusting for Different Microwave Wattages
3.3 Allowing Cooling Time Before Serving
Other Cooking Methods
4.1 Oven Instructions
4.2 Toaster Instructions
4.3 Skillet Instructions
FAQs
5.1 Can I Microwave Frozen Eggo Mini Pancakes?
5.2 Can I Put Eggo Mini Pancakes in the Toaster?
5.3 How Do I Reheat Leftover Eggo Mini Pancakes?